How to Migrate Your WordPress Site with All-in-One WP Migration
Moving your WordPress site to a new host doesn't have to be stressful. Whether you're chasing better performance, tighter security, or simply lower costs, the All-in-One WP Migration plugin makes the entire process surprisingly painless, even if you've never done it before.
This guide walks you through every step, from exporting your site to importing it on your new host, along with troubleshooting tips and best practices to keep things running smoothly.
Why Move Your WordPress Site?
There are plenty of valid reasons to switch hosting providers. Your current server might be slow, unreliable, or lacking the features you need. Maybe support is unresponsive, or you've simply outgrown your plan. Whatever the reason, staying on subpar hosting costs you visitors, conversions, and peace of mind.
The right migration tool removes the technical barrier so you can focus on what matters: getting onto a better platform.
What Is All-in-One WP Migration?
All-in-One WP Migration is a WordPress plugin by ServMask, trusted by over 60 million websites since 2013. It packages your entire site (database, media, plugins, themes, and settings) into a single downloadable file that you can import into a fresh WordPress installation with just a few clicks.
Key highlights:
- Works with every hosting provider
- Your site stays online during migration
- Built-in find-and-replace for domain changes
- Supports MySQL, MariaDB, and SQLite
- Free version handles sites up to 512 MB
- Premium extensions remove size limits and add cloud storage, scheduled backups, and multisite support
Step-by-Step Migration Guide
Step 1 - Install the Plugin
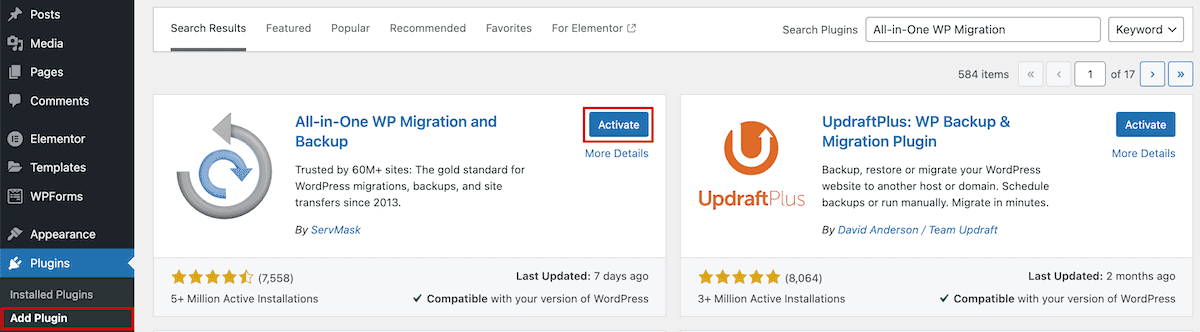
Log into the WordPress dashboard on your current site. Navigate to Plugins > Add Plugin, search for "All-in-One WP Migration" by ServMask, and click Install Now, then Activate.
A new menu item will appear in your admin sidebar.
Step 2 - Export Your Site
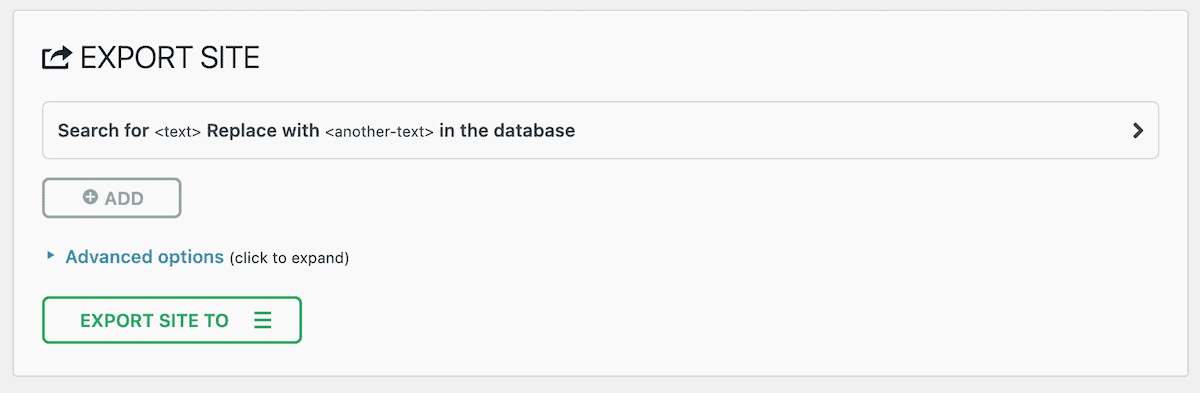
Go to All-in-One WP Migration > Export.
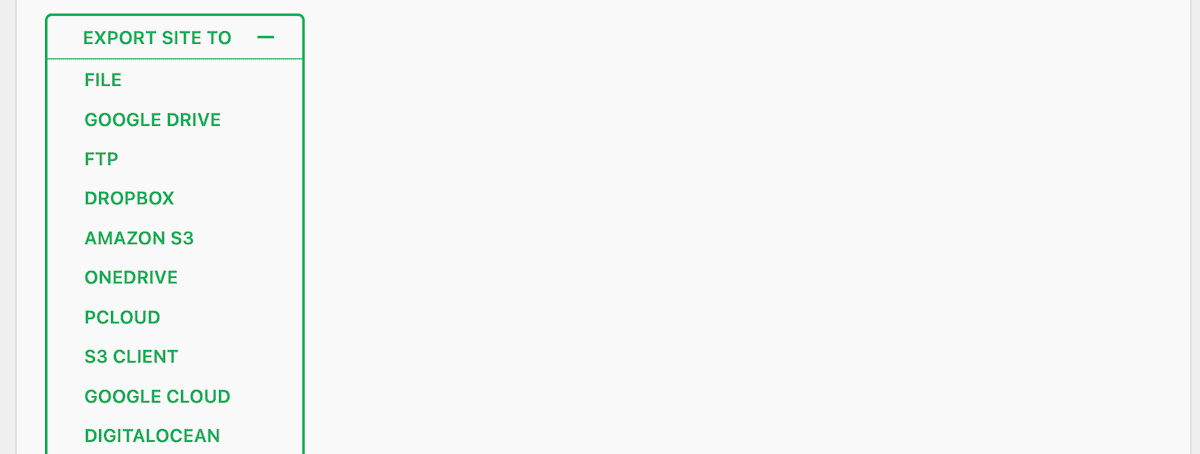
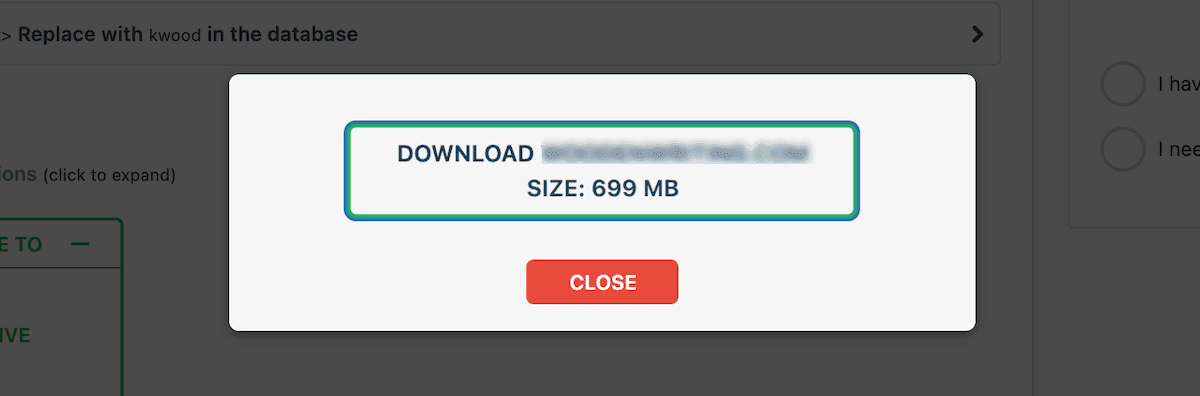
Standard export (same domain): Click the Export Site To dropdown and select File. The plugin will generate a .wpress archive of your entire site. Click Download when it finishes.
Changing domains? Use the find-and-replace fields at the top of the Export screen to swap your old domain for the new one before exporting. The plugin searches your entire database and updates every reference automatically.

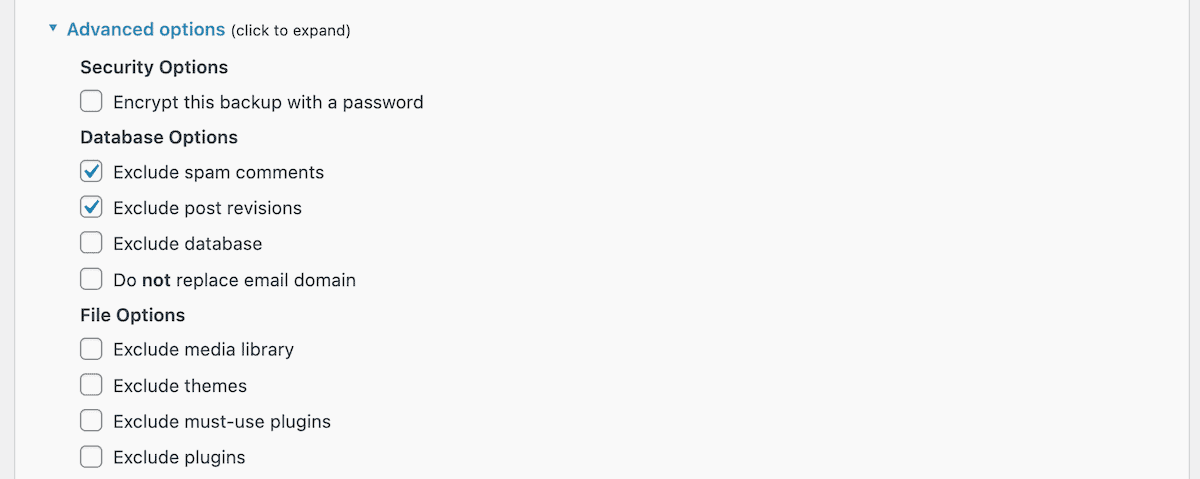
Want to slim down the export? Expand Advanced Options to exclude items like spam comments, post revisions, media files, or the uploads folder. This is useful for staying under the 512 MB free-tier limit.
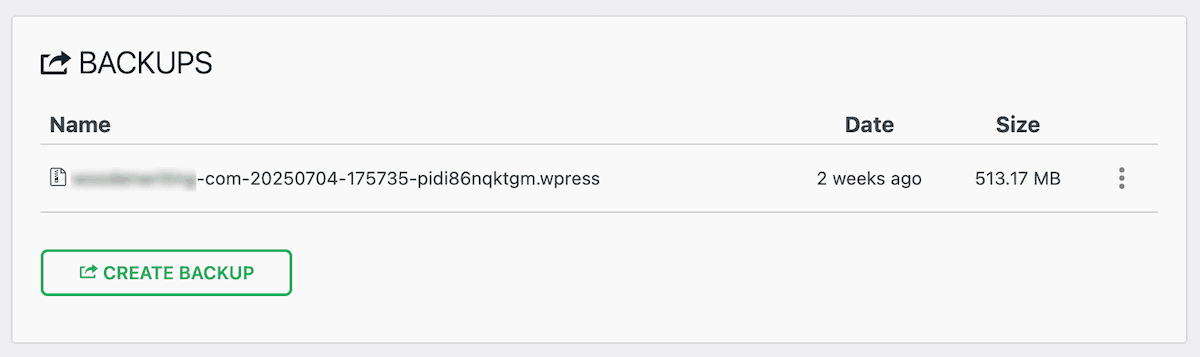
Every export you create is saved under All-in-One WP Migration > Backup, so you can always go back and download a previous version.
Step 3 - Prepare Your New Host
Before importing, you need a fresh WordPress installation on your new server. Most quality hosts offer one-click WordPress setup through their control panel. Use it. That's all you need at this stage.
Step 4 - Import Your Site
On the new WordPress installation, install and activate All-in-One WP Migration using the same process from Step 1.
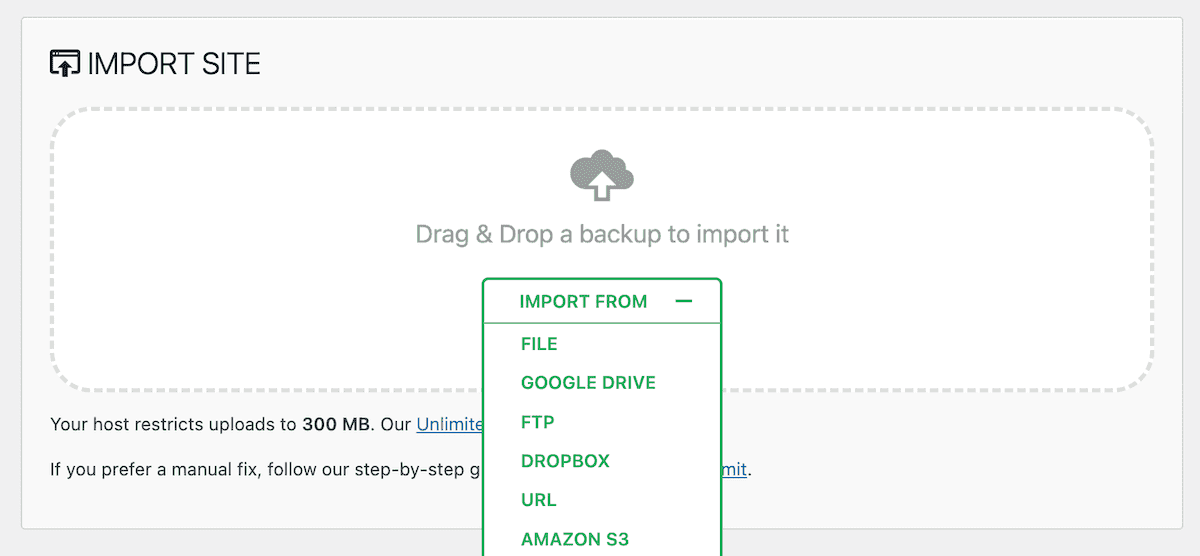
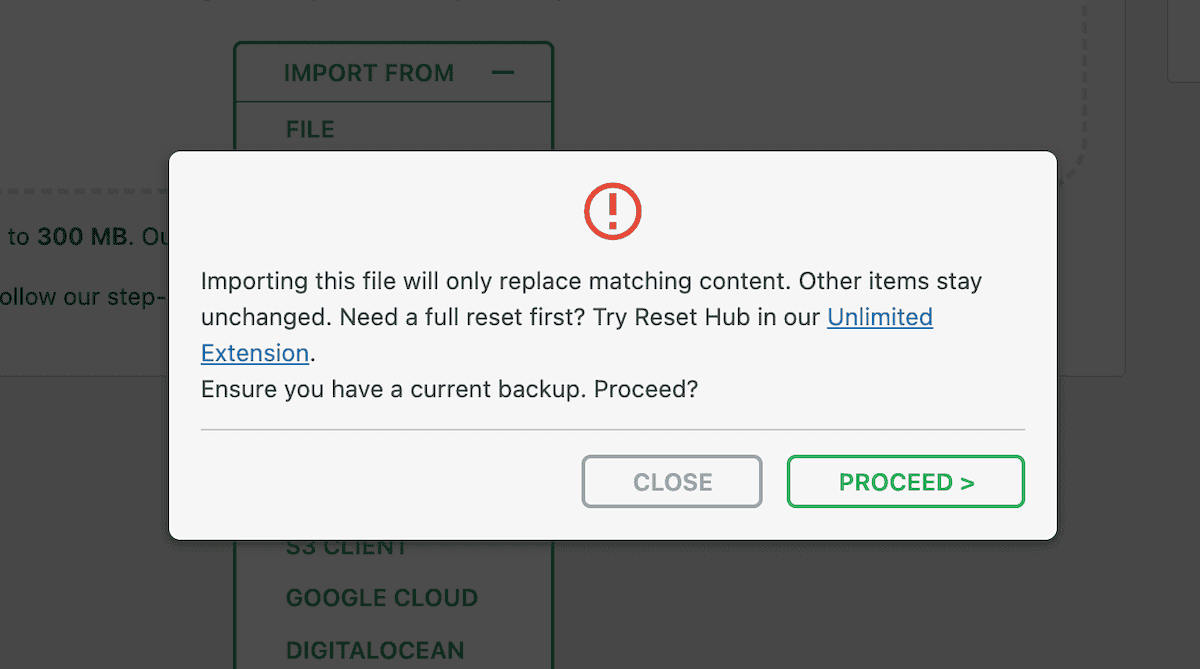
Navigate to All-in-One WP Migration > Import. Click Import From > File and select the .wpress file you exported earlier. When the warning appears that current data will be overwritten, click Proceed.
Be patient. Large sites can take several minutes. Don't close the browser tab.
After the import finishes, you'll see a success message with further instructions.

Step 5 - Finalize the Migration
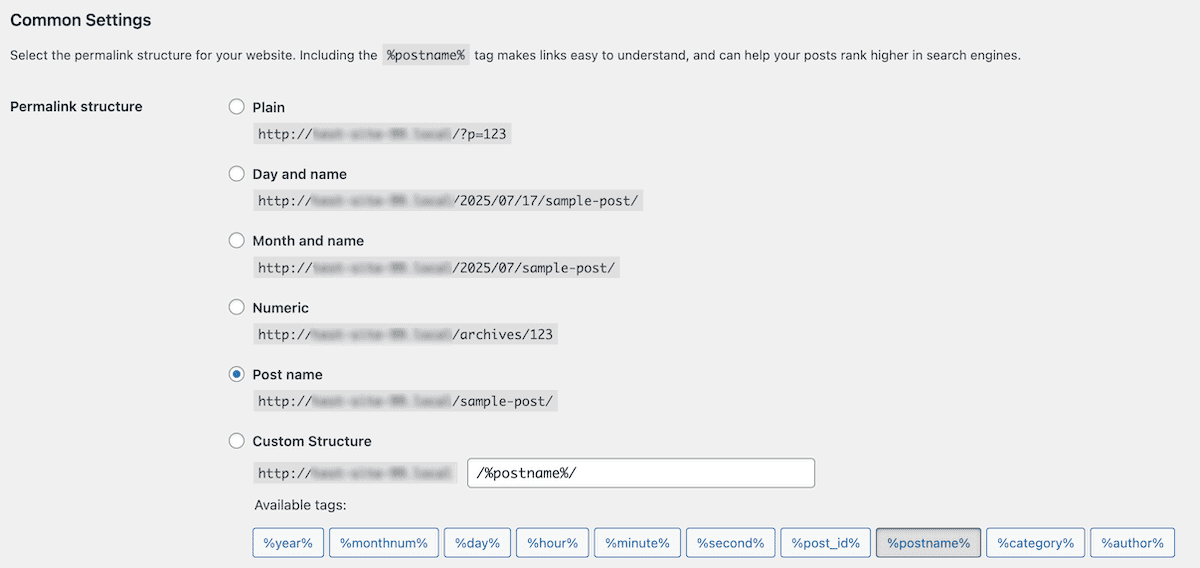
After the import completes, you'll see a success message with a link to save your permalink structure. Click it.
Important: Log in using the credentials from your original site, not the fresh installation.
Once logged in, go to Settings > Permalinks, verify the structure looks correct, and click Save Changes. Browse through your pages and posts to confirm everything migrated properly.
Important
After the transfer is complete, you must remove the security plugin from the mu-plugins folder on your new hosting. This plugin is automated by our system and will cause a blank screen if left in place.
Troubleshooting Common Issues
File size limit exceeded
The free version caps imports at 512 MB. You can either purchase the Unlimited Extension ($69/year) or reduce your export size by excluding media, plugins, or themes via Advanced Options and transferring those files manually over FTP.
Import stuck or frozen
Wait at least 15 minutes before assuming failure. If it still won't complete, deactivate all other plugins on the new site, switch to a default theme, clear your browser cache, and retry.
404 errors after migration
Go to Settings > Permalinks, switch to a different structure, save, then switch back and save again. This flushes the rewrite rules.
White screen or 500 error
Enable WordPress debugging (WP_DEBUG) to identify the root cause. Common culprits include plugin conflicts, theme incompatibilities, or a mismatched PHP version.
Best Practices
Before you start
- Create a separate, independent backup of your site
- Clean up unused plugins, themes, and media to reduce file size
- Schedule the migration during a low-traffic window
During the migration
- Don't make changes to either site while the process is running
- Keep the browser tab open and be patient with large exports/imports
After it's done
- Test every page, form, and feature thoroughly
- Only update your DNS once you've confirmed the new site works
- Monitor performance for the first few days
- Create a fresh backup on the new host
Frequently Asked Questions
Is All-in-One WP Migration free?
Yes. The core plugin is free and available from the WordPress plugin repository. Premium extensions start at $69/year for sites that need more capacity or features.
Can I migrate a WooCommerce store?
Yes. The plugin exports products, orders, and customer data. For active stores processing frequent orders, consider a professional migration service to avoid losing transactions mid-transfer.
How long does a migration take?
Small to medium sites typically take 15 to 30 minutes. Larger sites with extensive media libraries can take several hours. DNS propagation after switching nameservers can take up to 24 to 48 hours, though your site remains functional during that time.
What if I don't want to do it myself?
Many hosting providers offer free migration services for new customers. If your new host provides this, let the professionals handle it, especially for complex or high-traffic sites.